
How to Biomap

Humanode Biomapper makes proving uniqueness fast, simple, and secure – no KYC, no personal identification information required, just Sybil resistance.
Whether verifying for the first time or checking biomapping status, the process is designed to be effortless, even if the user is not tech-savvy.
From a developer's point of view, you might wonder whether the Biomapping process will be easy for your users or will have to create special guides to teach them. Well, worry not Biomapping and verifying uniqueness is as easy as ABC.
Here’s how it works;
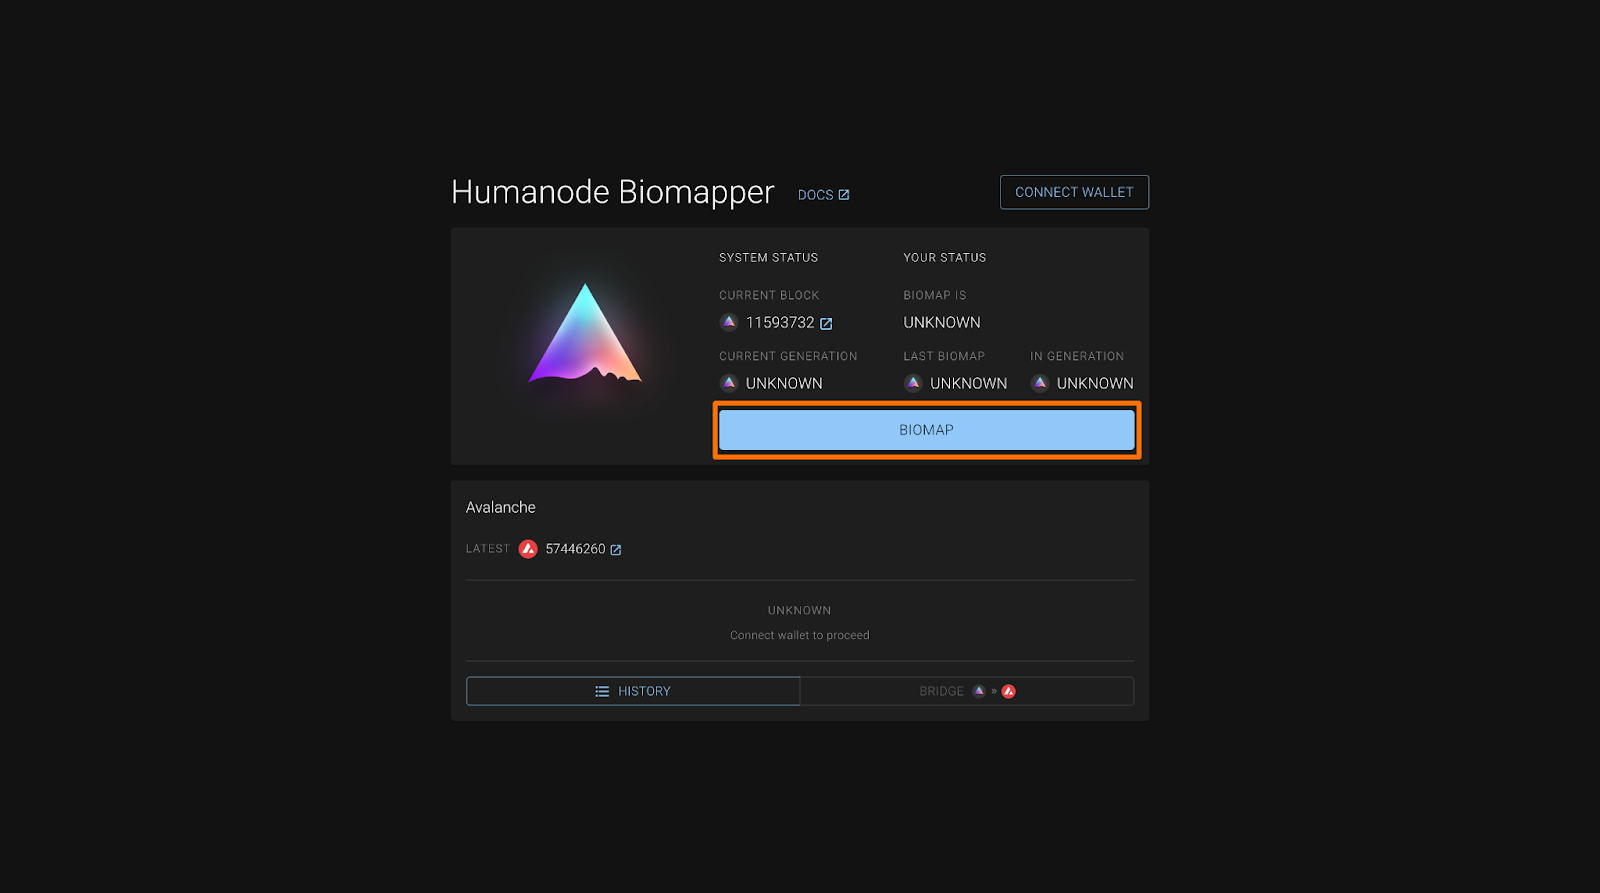
Step 1: User Lands on the Biomapper Dashboard Page
When users access Biomapper, they start on the dashboard page. The dashboard displays their biomapping status (i.e., whether they already have a Biomap for the current generation). 1. The user connects their EVM wallet they want to link to their biomap.
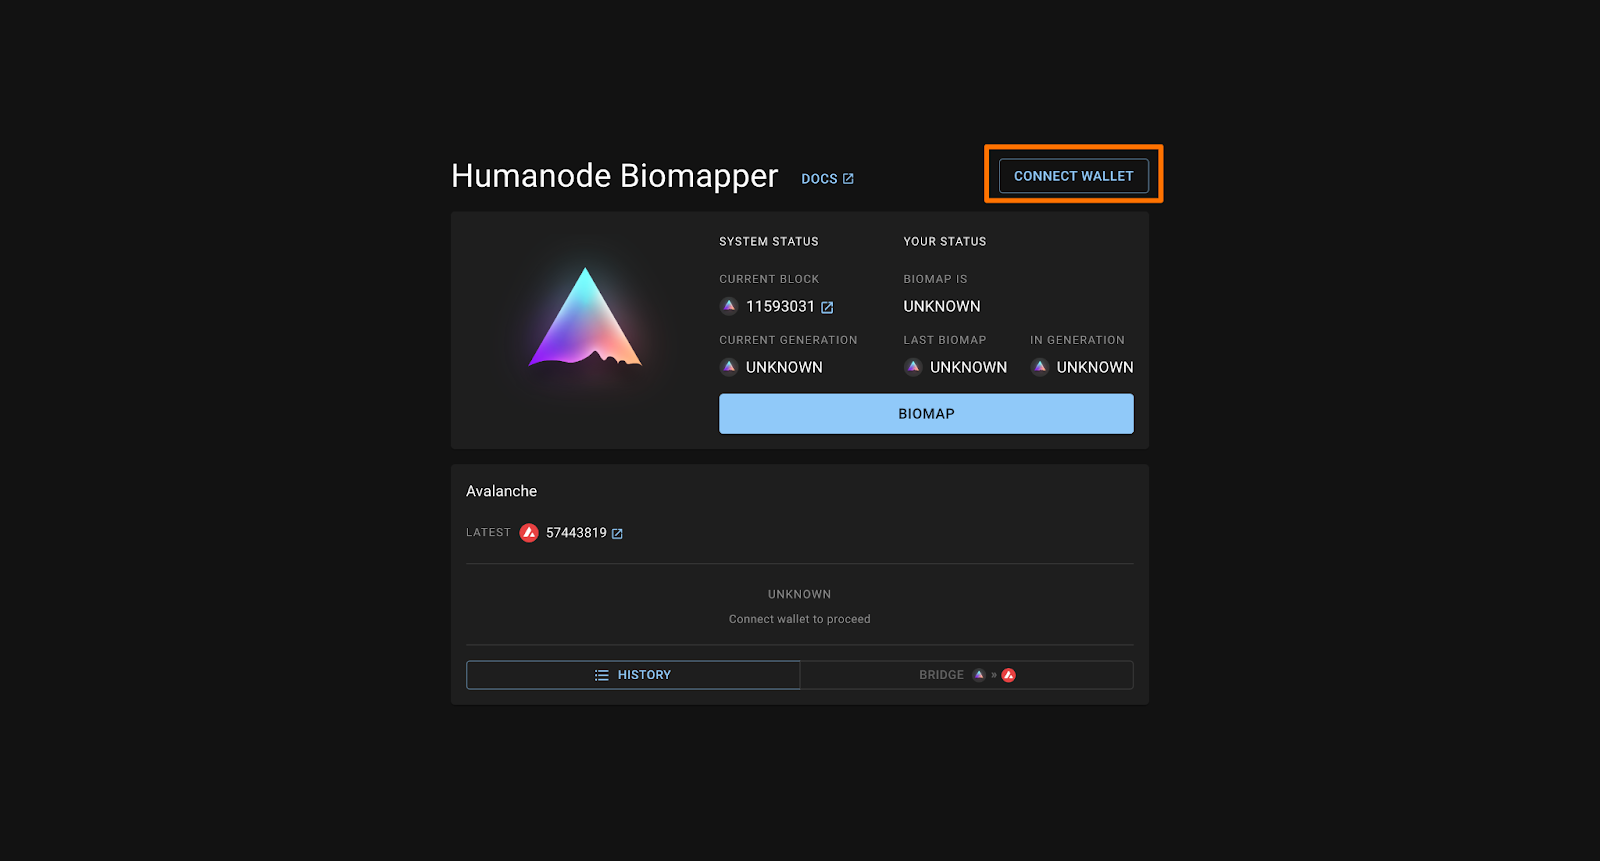
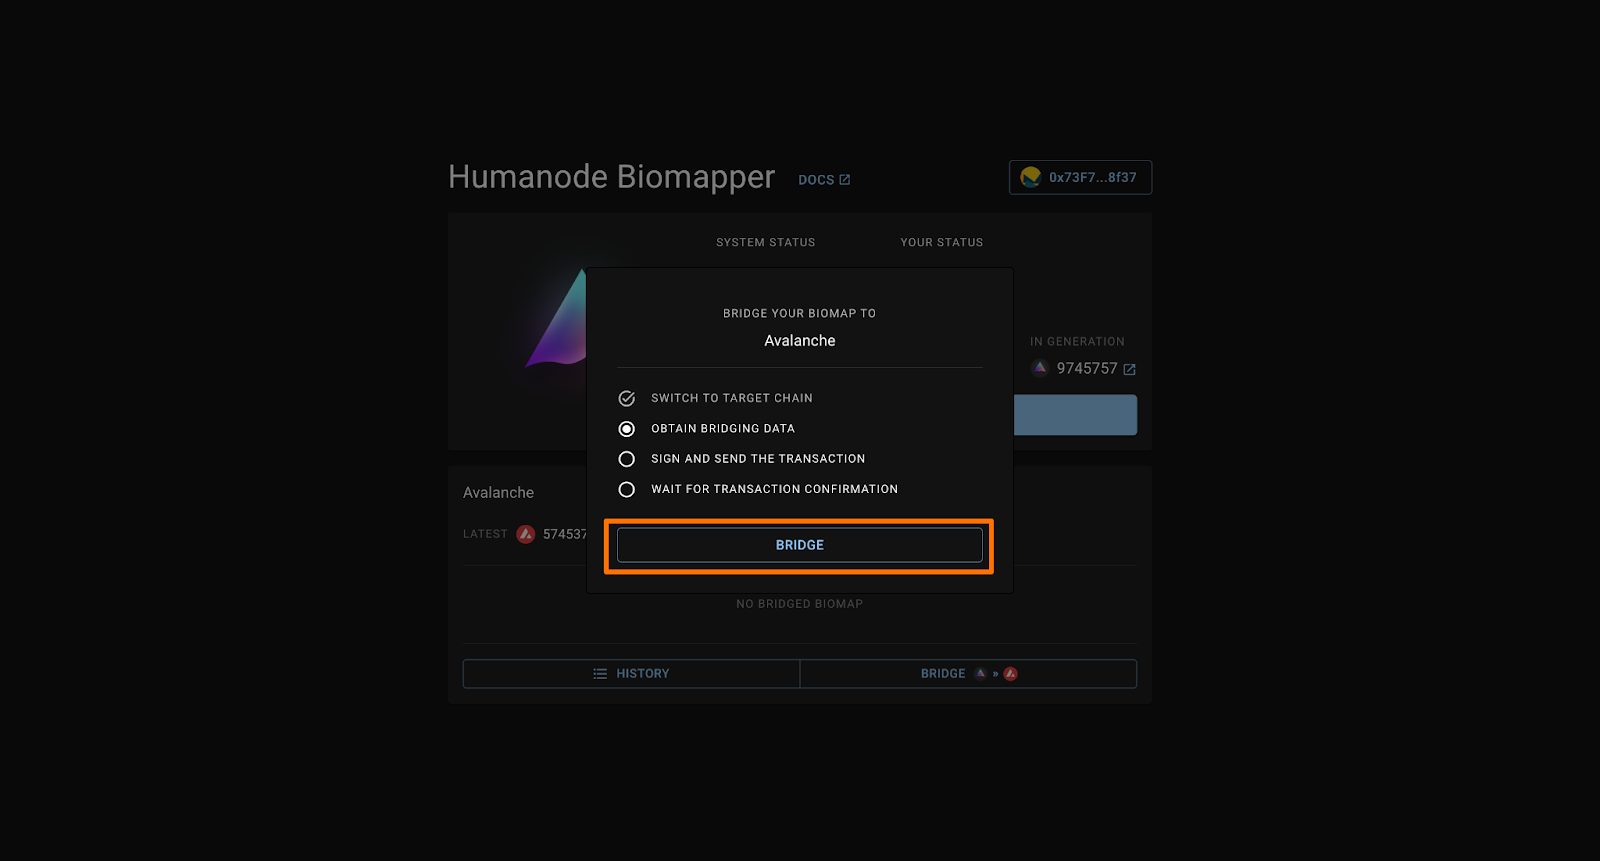
If they are already biomapped, they can bridge their Biomap to the desired chain and use your dApp. If they are not biomapped, they can click on the Biomap button to start the process.
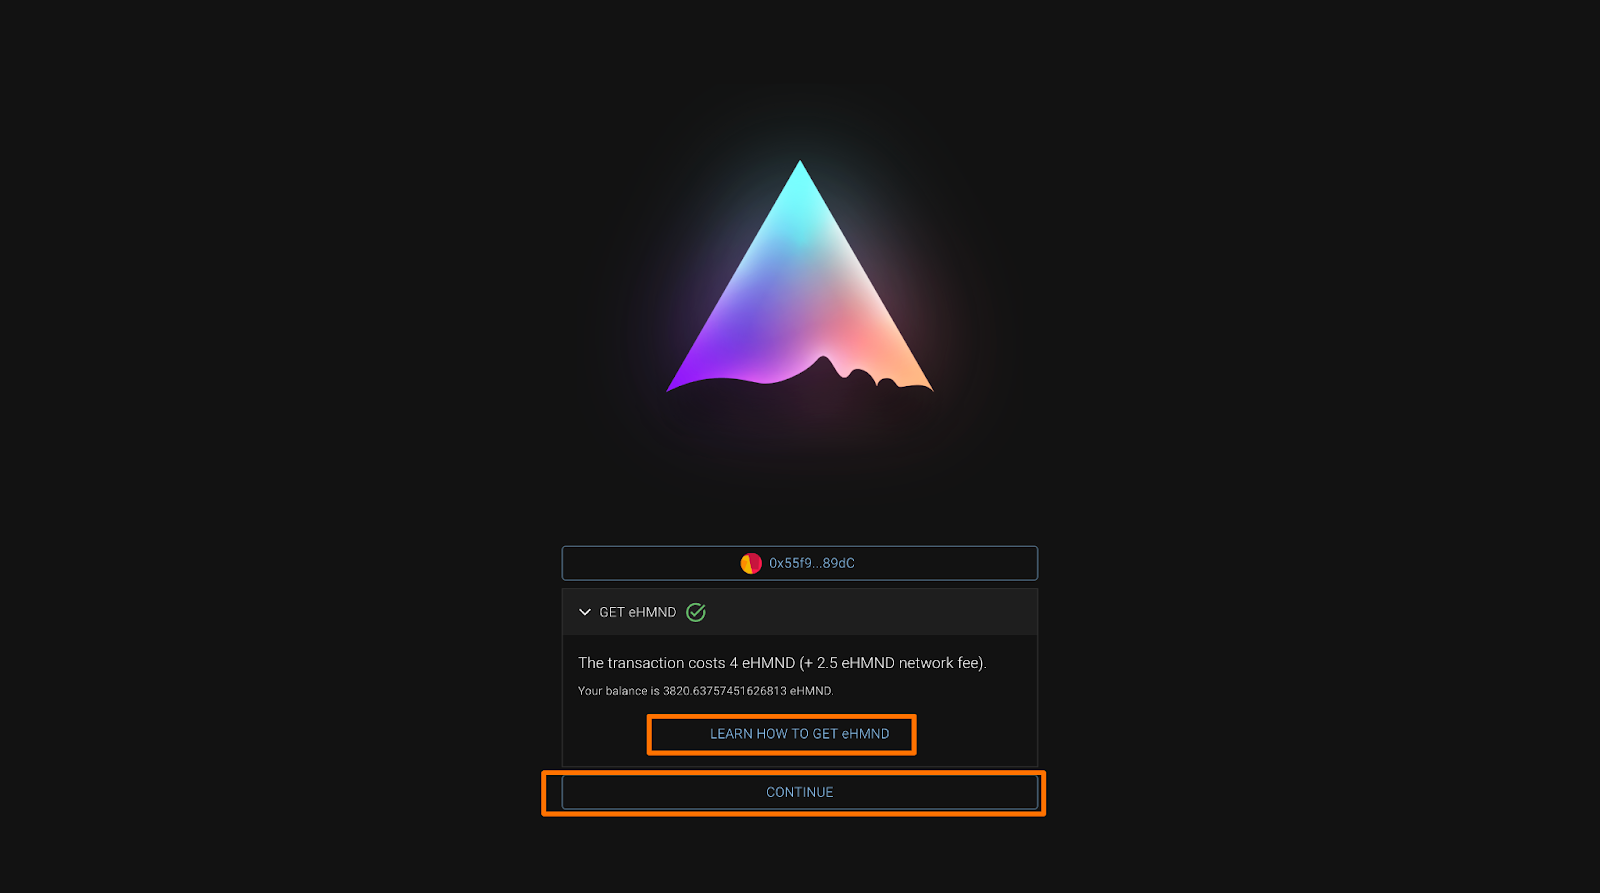
Step 2: Biomap Page - Accept Terms and Confirm Age
- Before starting verification, users must:
- Review and accept the Terms of Service & Privacy Policy.
- Confirm they are of legal age.

- After agreeing to the terms, they can proceed to the face scan step. But there’s a little catch, user will need eHMND in their wallet to complete the face scan. The fee is usually 4eHMND+2.5eHMND(as a network fee). They can buy eHMND directly from BitMart or convert HMND bought from other exchanges into eHMND. There’s a quick guide on How to get eHMND on the page.
Step 3: Face Scan and Liveness Check
Users now complete biometric verification using a live face scan:
- The user positions their face in front of the camera.
- Their biometric data is captured and securely sent to the Confidential Virtual Machine (CVM) via an encrypted channel.
- The CVM performs two key checks:
- Liveness detection → Ensures the user is real (not a deepfake or spoofed image).
- 1-to-n matching → Confirms the user hasn’t already been biomapped in the current generation.
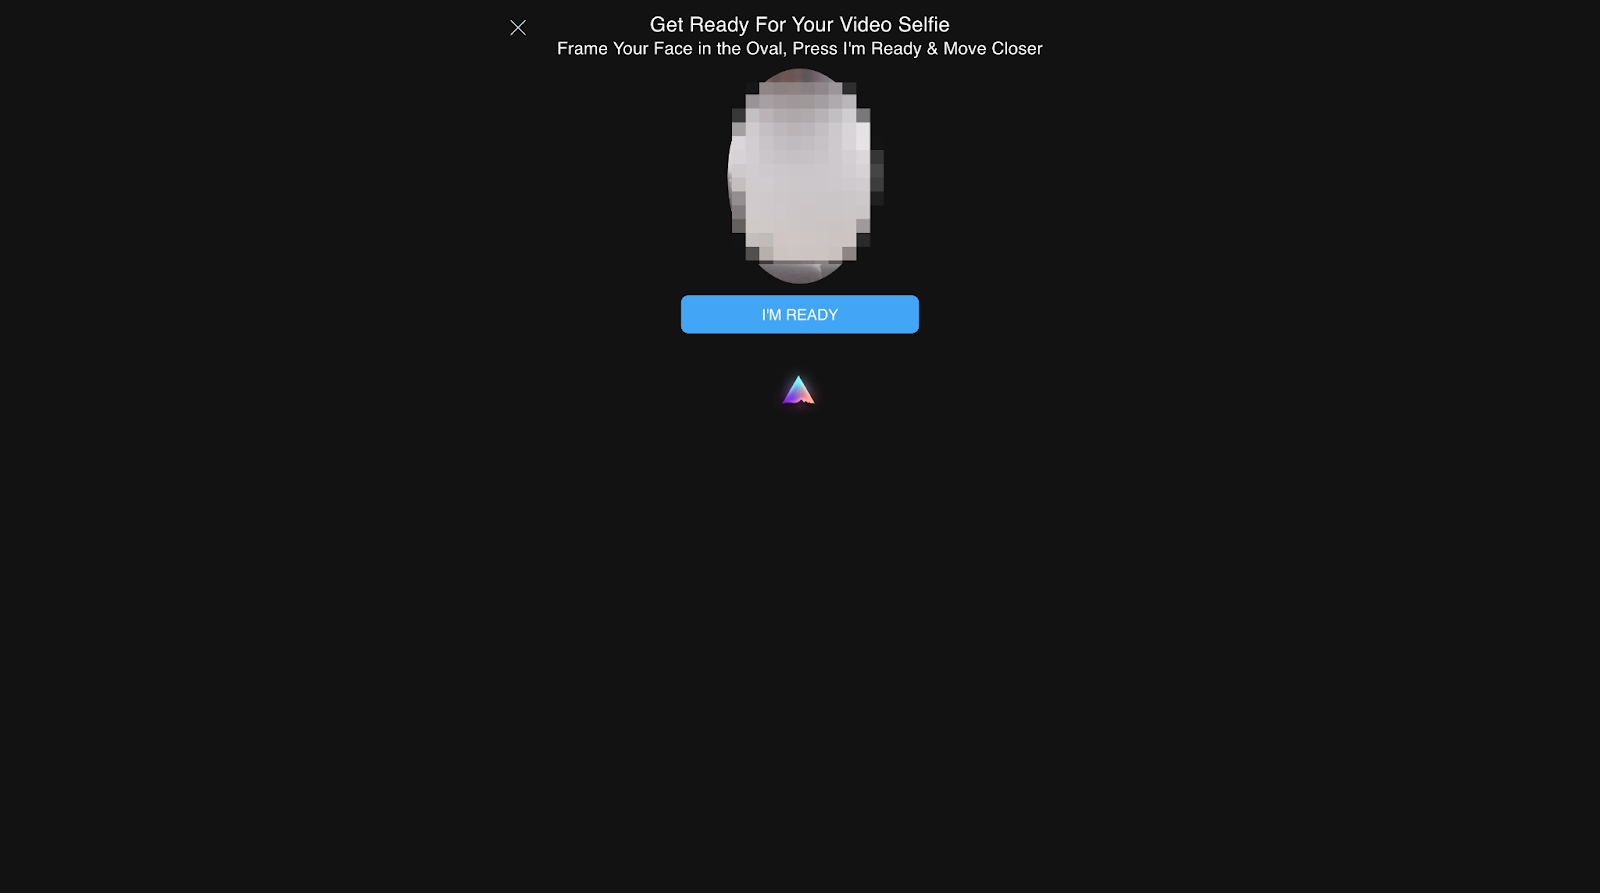
If the scan is successful, users move to the signing process.
Step 4: Signing Page - Link Biotoken to EVM Wallet
After passing private biometric verification, the user must link their biomapping proof (Biotoken) to an EVM wallet.
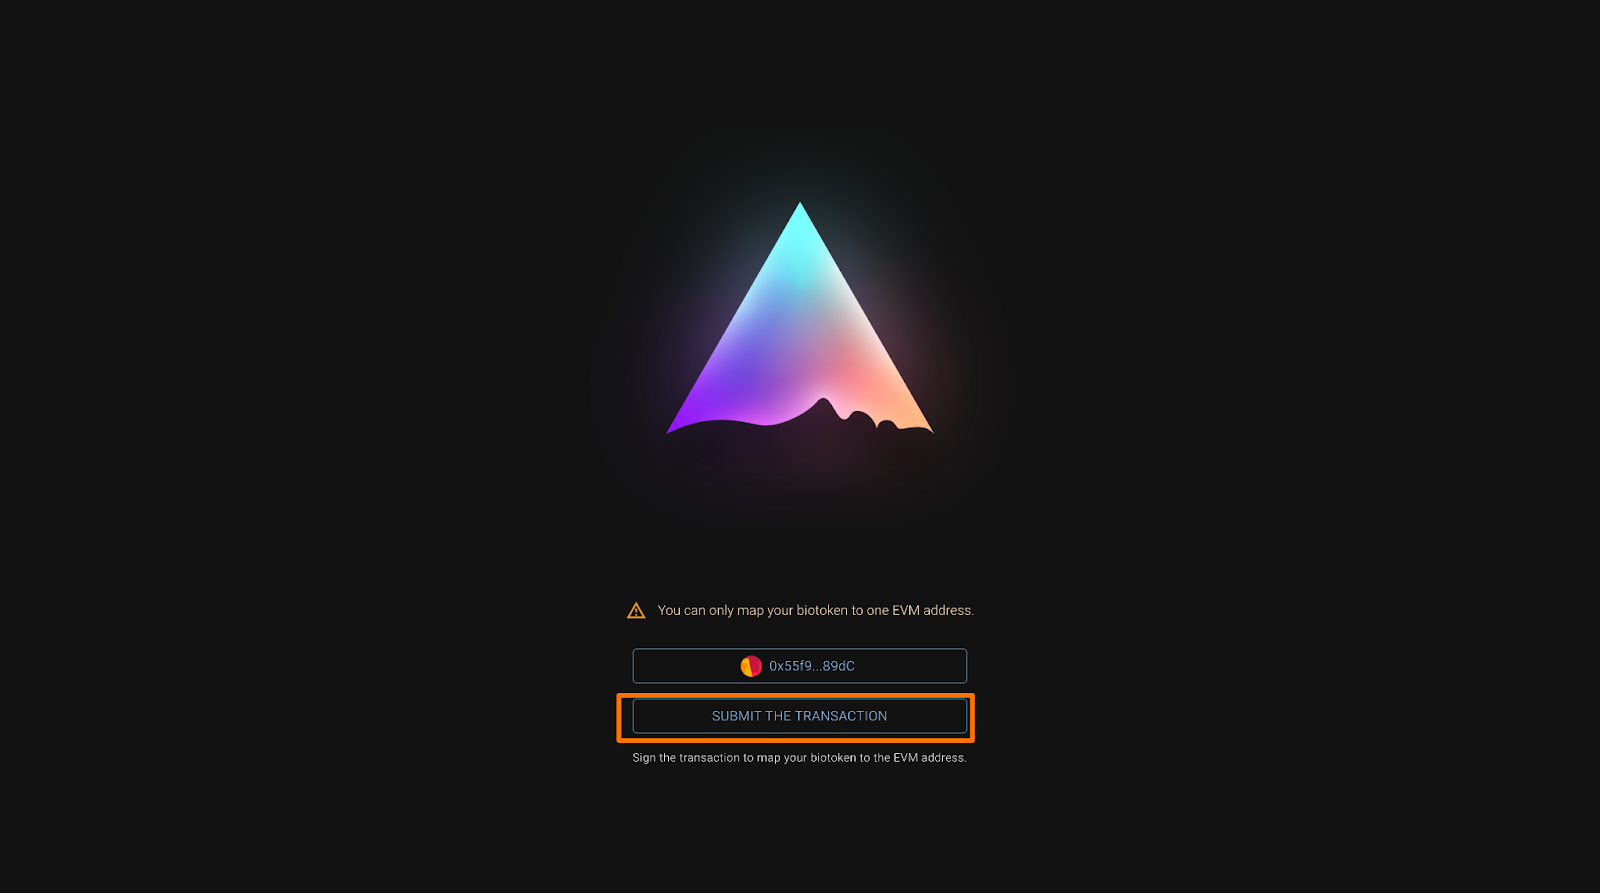
- User selects their preferred EVM wallet (e.g., MetaMask).
- The Biotoken (a hashed form of their Humanode Identifier) is created.
- The user signs a message containing the Biotoken in their wallet.
- The signed message is sent to the Signing Server, which:
- Verifies the user's wallet ownership.
- Verifies the Biotoken belongs to the user.
and returns an attestation signature, confirming that the user owns both:
- EVM address
- Biotoken
- Finally, users sign and send a transaction to the Biomapper smart contract, calling the proveUniqueness function with their Biotoken and attestation signature.
- This creates an on-chain record proving the user's uniqueness.
Step 6: User Returns to Dashboard
- After submitting the transaction, users return to the dashboard page.
- Their biomap status is now updated, confirming their uniqueness.
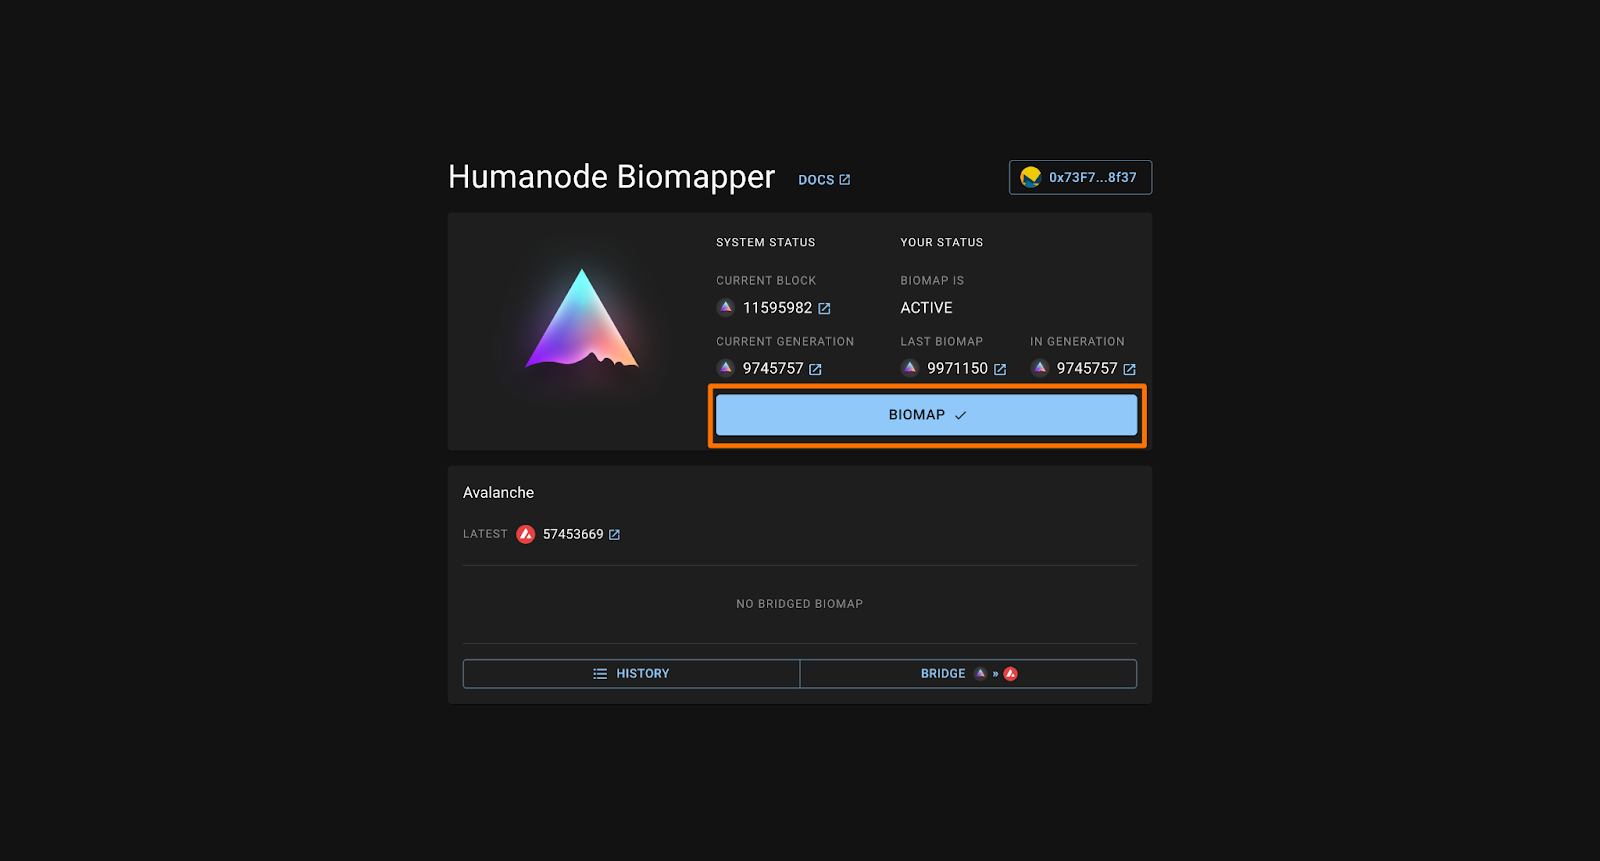
- They now have the option to bridge their biomap to any supported blockchain directly from the dashboard.
And that’s it. Users verify their uniqueness with just a few clicks without compromising their privacy.
Here's a quick overview of how it works:

Humanode Biomapper never asks for any personal identification information and it ensures that user’s biometric information remains private, secure, and anonymous. Meaning that no one neither Humanode nor any dApp has access to the biometric information. All the information is processed in verifiable Confidential Virtual Machines (CVMs).
For a deeper look into How Biomapper ensures data privacy and security, data encryption, processing, and storage, check out this detailed article: Data Privacy in Biomapper.